The graphical interface
The graphical interface#
Cubix allows you to perform \(\gamma\)-ray spectroscopy analysis from histograms stored in ROOT files.
To start Cubix, simply use the command cubix
cubix
   ______        __     _       | Documentation: https://cubix.in2p3.fr/
  / ____/__  __ / /_   (_)_  __ |
 / /    / / / // __ \ / /| |/_/ | Source: https://gitlab.in2p3.fr/ip2igamma/cubix/cubix
/ /___ / /_/ // /_/ // /_>  <   |
\____/ \____//_____//_//_/|_|   | Version 1.4

[==        ] Loading tkn db...
 The TkN database is loaded in a separate thread when Cubix starts. It should take ~15 seconds (if not compiled in Debug), and does not block the general Cubix interface.
This will open the Cubix main window as below:
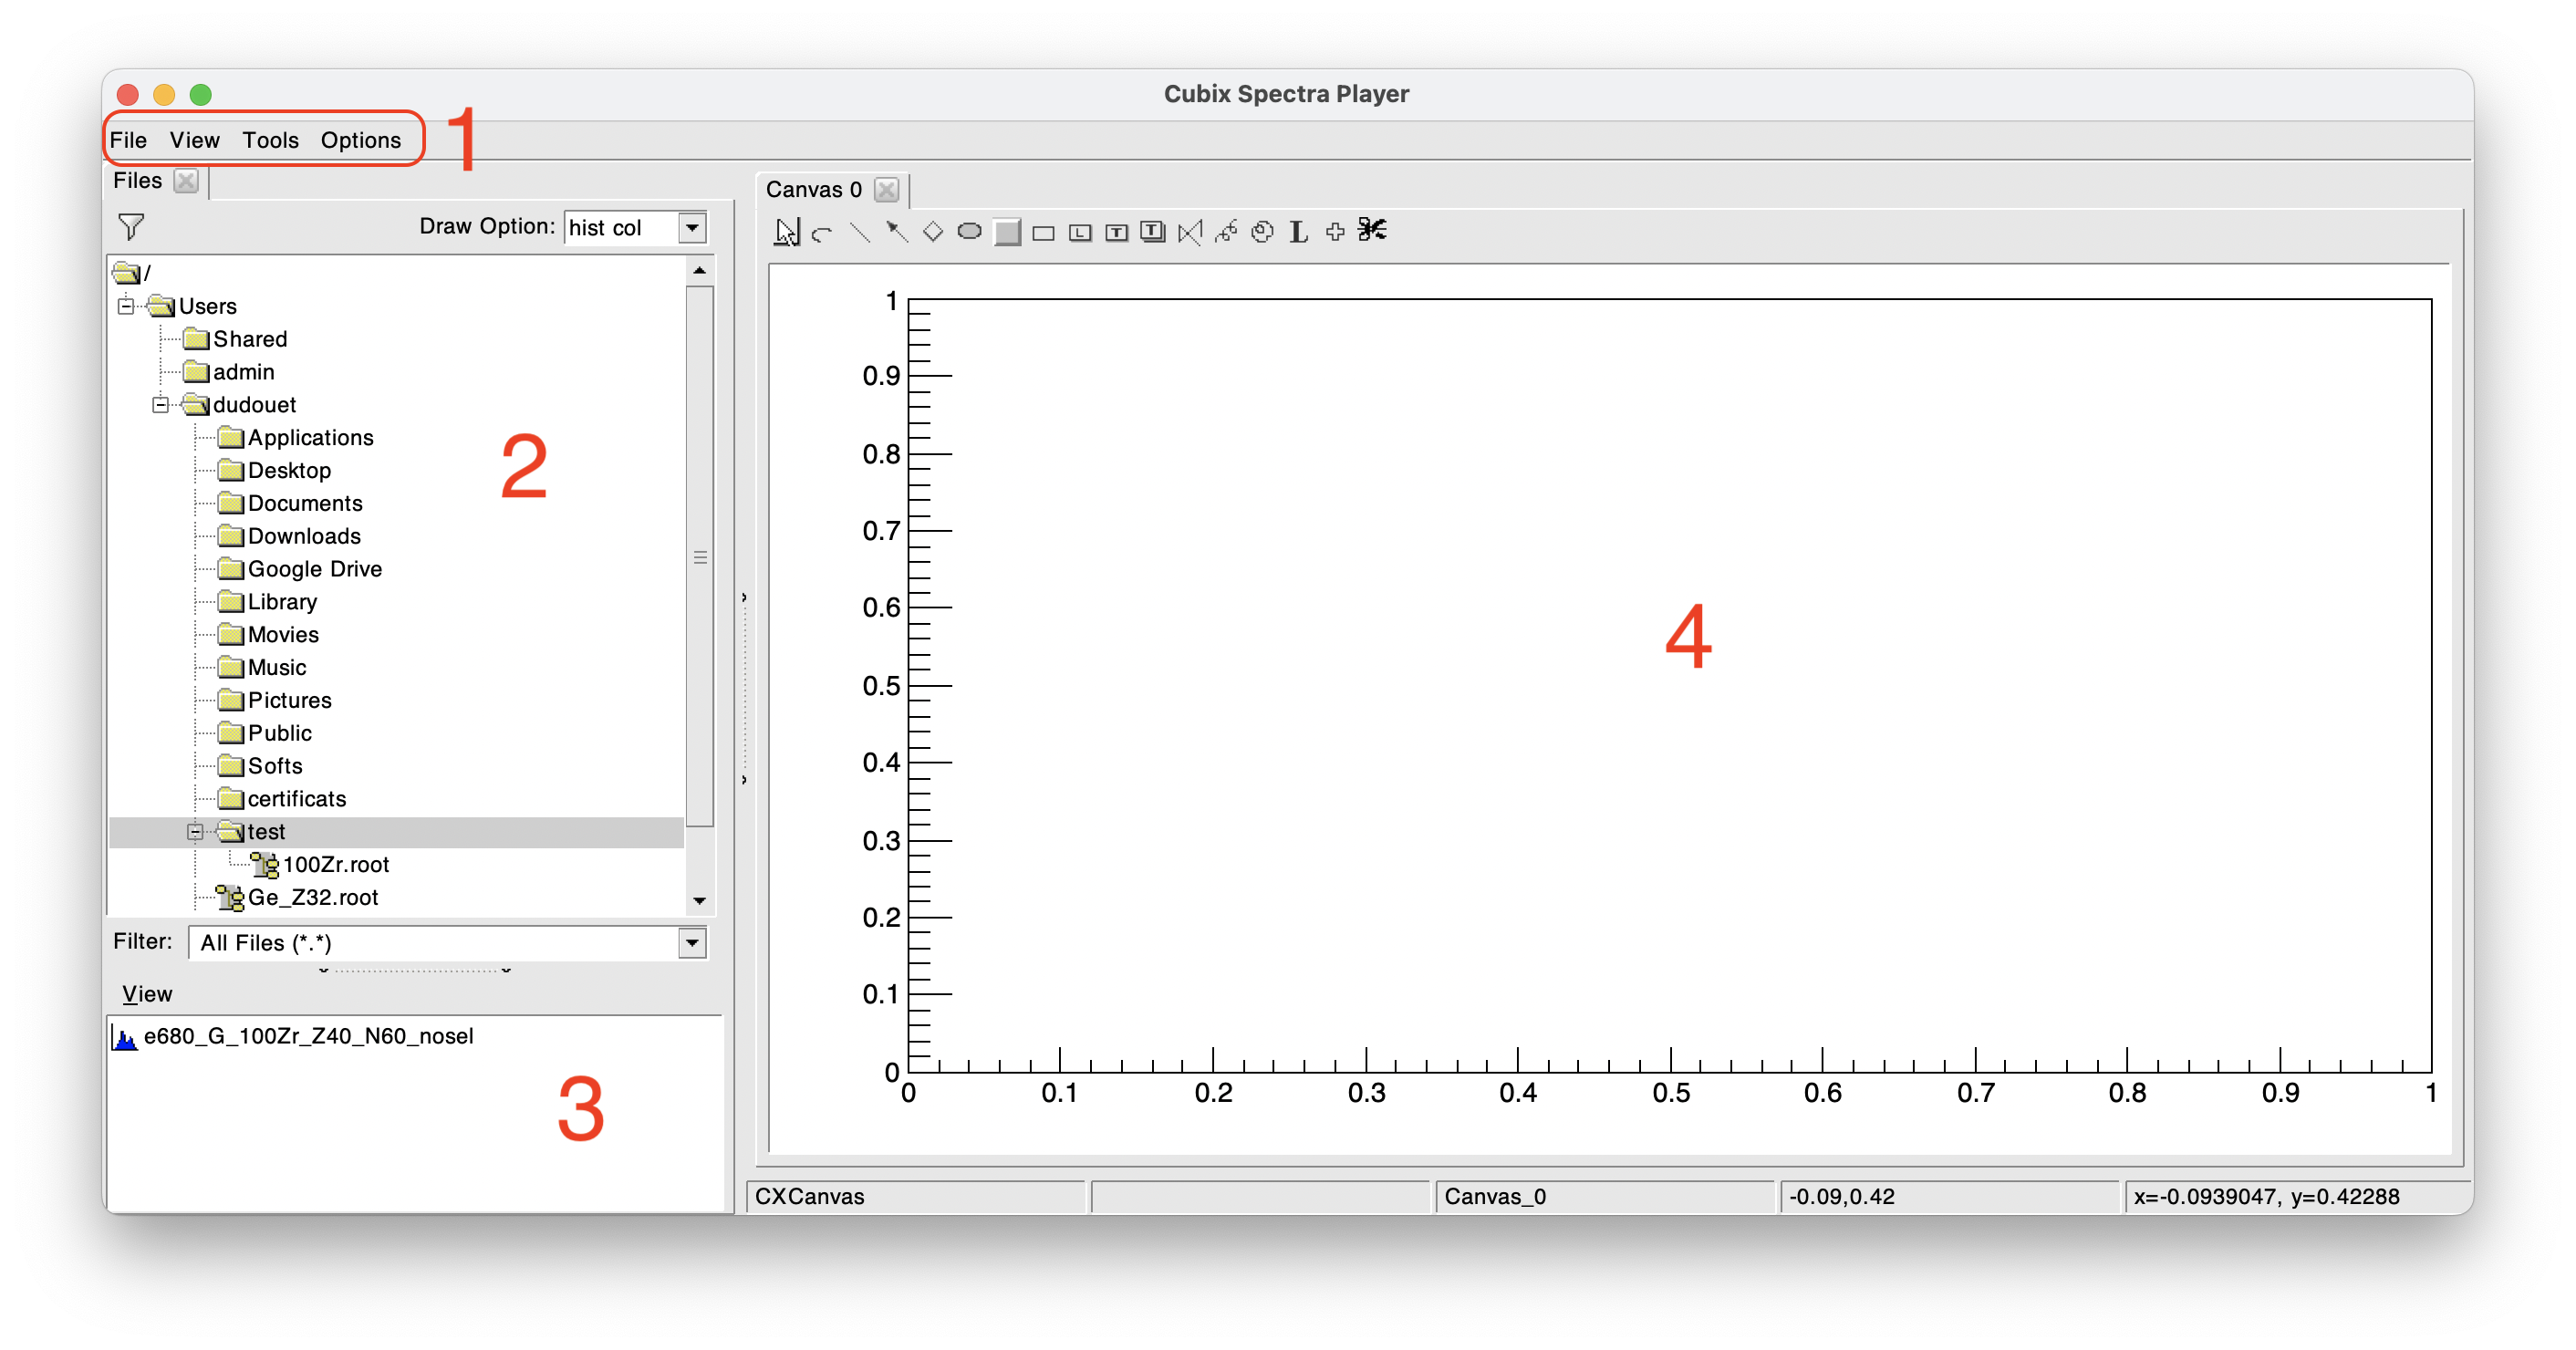
The Cubix main window is composed of different parts:
The Menu Bar#
The menu bar is composed of the following parts:
- The File menu:
- New Canvas: add a new active canvas to the display part
- New multi-pad Canvas: add a new active multi-pad canvas (open a dialog box asking for the number of X and Y pads)
- New Browser: open a standard ROOT TBrowser
- Save Canvas as: save the active canvas in the desired format (png, pdf...)
- Save hist as: save the active histogram either in ASCII or Radware format (".spe")
- Exit: exit cubix
- The View menu:
- Browse Files: Open the file browser (part 2 in the picture above)
- Saved list: Open the histogram saved list (see below)
- Workspace manager: Open the workspace manager (see below)
- Show editor: Open the ROOT editor
- Tools: These elements are described in detail in the following
- Options:
- Show stats: to display or not the spectra statistics
- Show Title: to display or not the spectra titles
The file browser#
By default, the left panel is dedicated to the file browser. It allows you to navigate in your directories to find your favourite ROOT file and open it (double click).
The file content will be displayed in the ROOT file browser (bottom left part). In this example (figure above), the opened ROOT file contains one 1D histogram.
To display a spectrum, double click on it. Using a right click on 1D/2D histograms, some shortcuts can be available for fits, background analysis or \(\gamma-\gamma\) analysis.
The ROOT file browser#
The ROOT file browser shows the content of the selected ROOT file. It lists the histograms and objects that can be displayed in Cubix. Double click on an object to draw it in the active canvas. Right click on supported spectra to access contextual analysis tools.
The saved list utility#
During an analysis, it can be useful to save spectra so they can be reused or written to disk. Any spectrum can be added to this list (right click: Add to stored spectra). This is particularly useful during \(\gamma-\gamma\) analysis to save the different projections.
In the following example, we can see that 3 spectra have been added to the saved list. It is then possible to write these spectra on disk using the "Save" button

The Workspace manager#
The workspace manager allows to create different workspaces for the analysis. A workspace generally corresponds to an experiment configuration.
A workspace can contain:
- Energy calibration properties:
- graphical plot E (keV) vs E (channels) on which the calibration has been performed
- energy calibration function
- energy calibration error band (95% confidence level) calculated in the fit process
- residual plot resulting from the calibration process
- Efficiency properties:
- efficiency graph on which the fit has been performed
- efficiency function
- efficiency error band (95% confidence level) calculated in the fit process
- Energy resolution properties:
- FWHM graph on which the fit has been performed
- FWHM function
- FWHM error band (95% confidence level) calculated in the fit process
- Angular correlations:
- Geometrical correction factors (Q2/Q4) to be applied to angular correlation measurements
The way to create these objects is explained in the following sections.
In the following example, we can see the Workspace manager window, where two workspaces are loaded in Cubix: E680 and SourceRun. The efficiency of the workspace SourceRun is plotted (graph + function + error band).

To create a new workspace, click on New workspace and enter the workspace name. It will create the workspace with all entries defined as None. To fill the workspace, refer to the sections Energy calibration, Efficiency fit or Angular correlations
The content of a workspace can be plotted by clicking on the workspace name and double clicking on its different elements.
To load a workspace, select it by clicking on the workspace name and then click on Load. The workspace will then be printed as Current Workspace in the workspace manager. For example, in the figure above, the current workspace is E680, even if the workspace displayed in the bottom left part is SourceRun.
Once a workspace is loaded, its properties will be used in the different Cubix tools:
- The calibration function can be used to calibrate a raw spectrum,
- The efficiency function is used to correct the peak area obtained from the peak fit utility,
- The FWHM function can be used to:
- automatically adapt the width of the gates to the detector resolution,
- constrain the FWHM in the peak fit utility to the detector resolution.
The purpose of the Cubix workspace manager is to keep all this information available after closing Cubix. All these properties are stored on disk in the Workspace directory. By default, the workspace directory is located in ${HOME}/Cubix_Workspaces.
If a file named .cubixrc is found in the ${HOME}, it is read to configure the workspace manager. This file should be like the following:
**********************************
***  Cubix configuration file  ***
**********************************

# This file can be copied in the ${HOME} to be automatically read by cubix

# Cubix Workspace defines the folder in which the experiment workspaces are stored

CXWorkspace ${HOME}/Softs/Cubix/Workspaces

# Default_WS defines the workspace to be loaded by default when launching cubix

Default_WS E680
- The entry corresponding to CXWorkspace refers to the location where the workspaces will be stored.
- The Default_WS defines, if filled, the workspace that is loaded by default when launching cubix.
Other environment definitions can be added in the cubixrc file, such as the default 2D palette. For an example cubixrc file with all available options, see conf/cubixrc in the Cubix source directory.
The workspace directory can also be used to store some specific results from cubix like fit results.